How to Add Timestamps to YouTube Videos (4 Beginner-Friendly Methods)
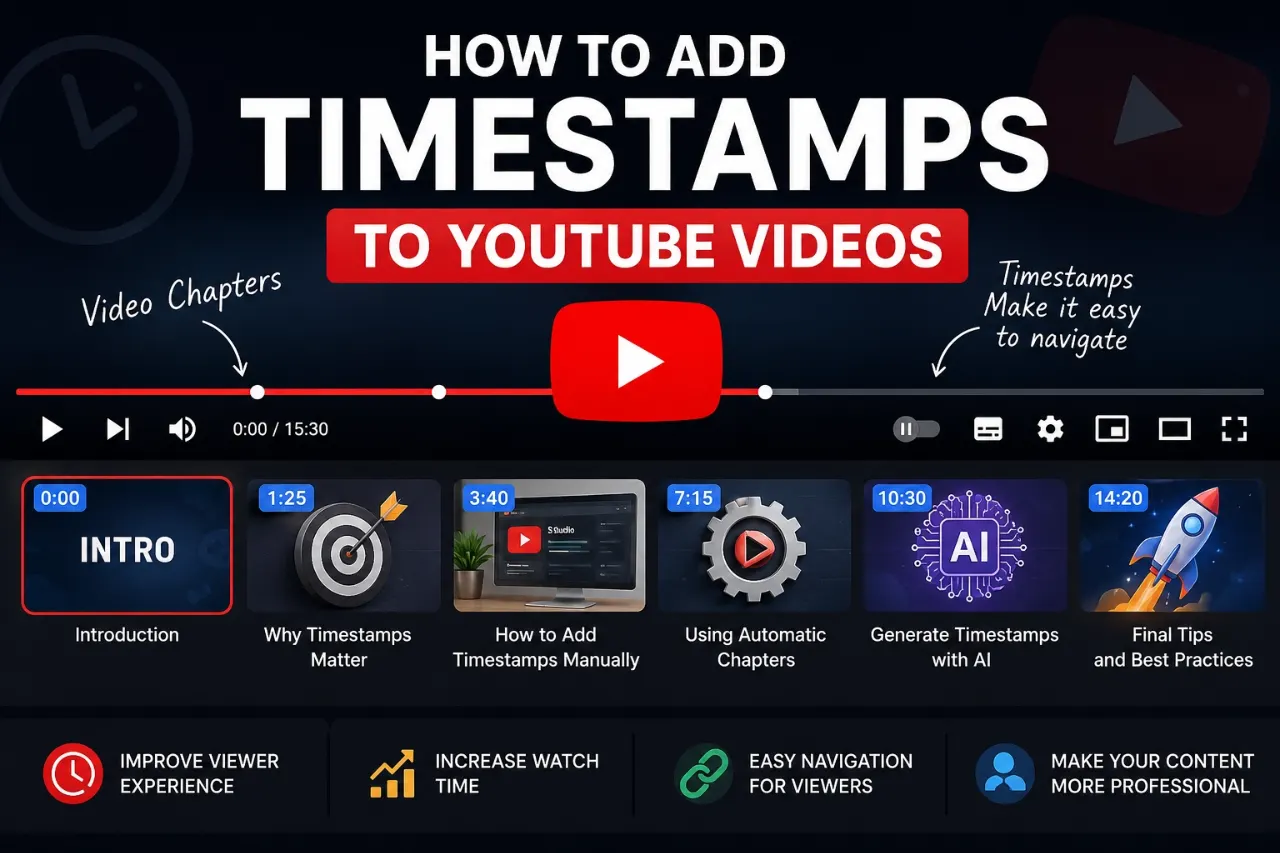
Picture this: someone finds your 25-minute tutorial, but they only need one answer buried at the 14-minute mark. If there's nothing to guide them there, they'll drag the scrubber around, get frustrated, and probably bounce before they find it — or before they even give your video a fair shot.
That's the entire problem timestamps solve. They're small, they take two minutes to add, and they can be the difference between someone watching 90% of your video and someone closing the tab in the first 30 seconds.
If you're just starting out, timestamps are one of those "why didn't anyone tell me this sooner" features. This guide walks through four ways to add them — manually, automatically, with AI, and as clickable links — plus the mistakes that trip up almost every new creator (I'll flag them so you can skip that phase entirely).
What Are YouTube Timestamps, Really?
A timestamp is just a marker that says "this specific moment happens here." You've seen them in video descriptions:
0:00 Intro
1:25 Why this matters
3:40 Step-by-step walkthrough
7:15 Common mistakes
10:30 Wrapping up
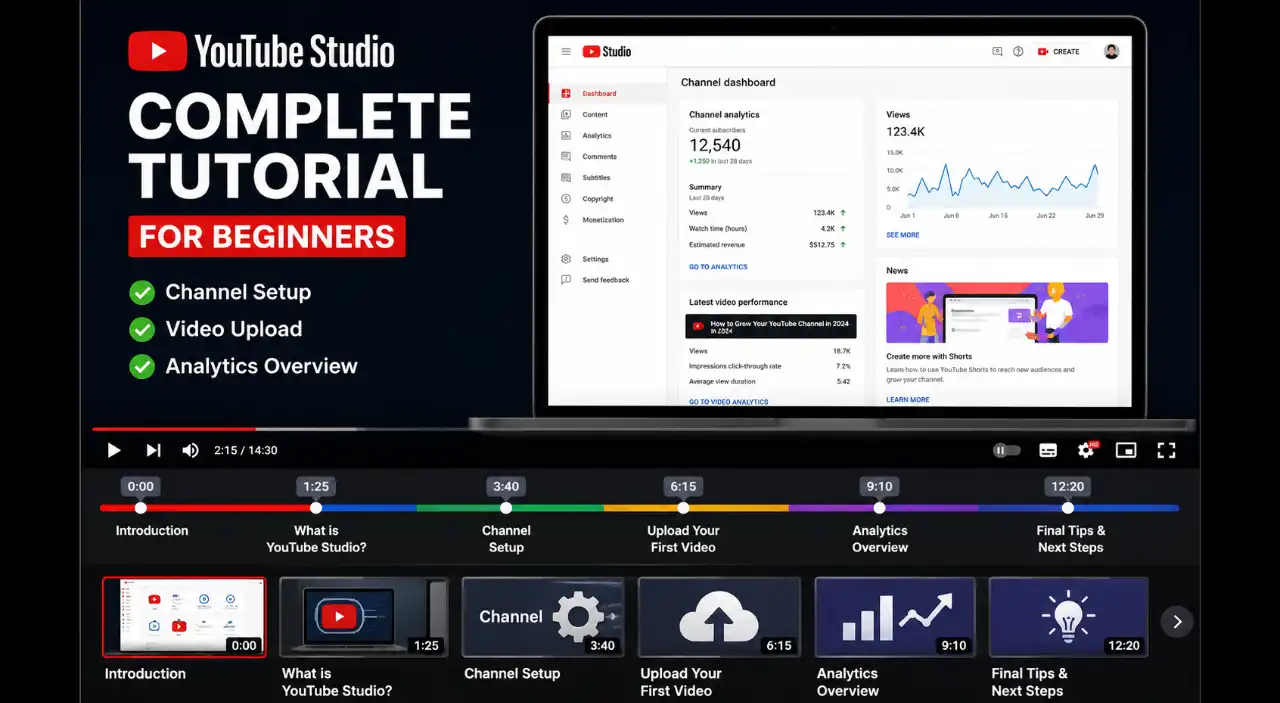
When you format a list like this correctly in your description, YouTube can turn it into chapters — those little labeled sections that show up on the video's progress bar. Viewers can click any chapter and jump straight there.
To get chapters (not just a plain list of numbers), YouTube wants:
- The first timestamp at
0:00 - At least three timestamps
- Each one in ascending order
- Each chapter at least 10 seconds long
Miss one of those and YouTube just treats your list as regular text — no clickable chapters, no timeline markers. Small formatting detail, big visual difference.
Why Bother With Timestamps When You're Just Starting Out?
I get it — when you're a new creator, you're juggling scripting, filming, editing, thumbnails, and titles. Timestamps can feel like an "extra" step you'll get to eventually. Here's why it's worth doing from video one.
They Turn Casual Viewers Into Engaged Ones
Say you publish "How to Start a YouTube Channel in 2026" and it covers picking a niche, setting up your channel, designing a logo, upload settings, content ideas, SEO, and monetization. Someone who already has a channel might only care about the SEO section. Without chapters, they have to sit through — or skip through — everything else. With chapters, they land exactly where they want to be, and they associate your channel with respecting their time.
They Make You Look More Professional Than You Feel
When you're new, production value is one of the fastest ways to build trust before you've built a big audience. A video with clean, descriptive chapters instantly reads as more polished — even if it's your fifth upload ever.
Writing Them Forces You to Structure Your Content
This one surprised me the first time I tried it. Sitting down to timestamp a video makes you notice when your structure is mushy. Compare these two:
0:00 Intro
2:00 Part 1
5:00 Part 2
9:00 Part 3
0:00 How thumbnails affect CTR
2:00 Picking the right style
5:00 Building in Canva
9:00 Thumbnail mistakes to avoid
The second version tells you — and your viewer — exactly what's in each section. If you can't write a clear chapter title, that's usually a sign the section itself needs tightening.
They Can Help Your Video Get Found
Descriptive chapter titles give search engines and viewers more context about what's actually inside your video. Google has been pretty consistent about wanting descriptive titles and relevant surrounding text near video content — chapters are a natural way to provide that. To be clear: timestamps alone won't rank a video. But paired with a genuinely useful video and an accurate title, they're one more signal that your content answers a specific question.
They Extend the Life of Evergreen Content
If you make a tutorial like "How to Edit Videos in CapCut," people will search for very specific things months later — adding captions, removing backgrounds, exporting in 4K. Clear chapters mean your two-year-old video can still serve a viewer who only needed one answer.
Method 1: Add Timestamps Manually (The Most Reliable Option)
This is the classic approach, and honestly, it's still the best one for anything you actually care about ranking or building a resource around. You watch your own video, note where topics shift, and type the list into your description.
Step 1: Open YouTube Studio
Log into your YouTube account and head to YouTube Studio. From the left-hand menu:
- Click Content
- Find the video you're editing
- Click the title or thumbnail
- Open the Details tab
Step 2: Head to the Description Box
Scroll down to the description field. A lot of creators put the chapter list near the top so it's the first thing people see:
In this video, I'll show you how to create thumbnails that actually get clicks.

⏱️ Chapters:

0:00 Intro
0:42 Why thumbnails matter more than you think
2:15 The right thumbnail size (and why it changes)
4:30 Building your thumbnail in Canva
8:20 Adding text people can actually read
11:45 Exporting without losing quality
13:10 Mistakes that quietly kill your CTR
15:00 Final tips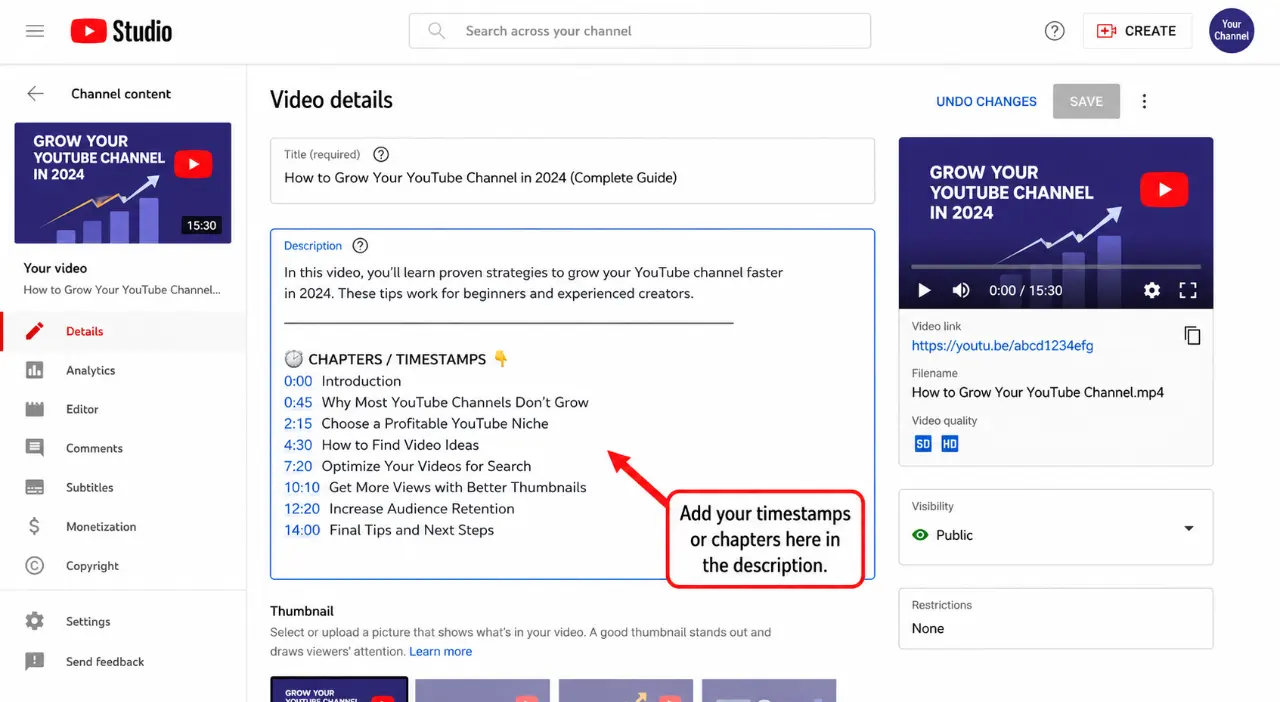
Step 3: Always Start at 0:00
Non-negotiable. If your first timestamp isn't 0:00, YouTube won't recognize the list as chapters at all — it'll just sit there as plain text.
0:00 Intro0:10 IntroStep 4: You Need At Least Three
Two timestamps won't trigger chapters. Three is the minimum.
Step 5: Keep Them in Order
Every timestamp should move forward, never backward.
Step 6: Save and Double-Check
Hit Save, then actually open the public (or unlisted) video and look at the progress bar. If everything's formatted right, you'll see the timeline split into labeled sections.
A Real Example
Say you've made a 22-minute video called "YouTube SEO for Beginners: How to Rank Your Videos." Your chapters might look like:
0:00 What YouTube SEO actually means
0:48 How YouTube's search actually works
2:10 Finding keywords people are searching for
4:25 Writing a title people click on
7:30 Optimizing your description
10:15 Choosing tags (and whether they still matter)
13:40 Building a thumbnail that gets clicked
15:20 Improving watch time
18:10 Your final SEO checklist
Where Manual Timestamps Work Best
- Tutorials and how-to videos
- Educational content
- Product reviews & software walkthroughs
- Courses, podcasts, interviews & webinars
- Gaming guides
Method 2: Let YouTube's Automatic Chapters Do the Work
If you're uploading often and don't have time to timestamp everything by hand, YouTube can sometimes generate chapters for you.
Turning It On
Open your video in YouTube Studio and check the details page for an automatic chapters (sometimes labeled automatic concepts) option. Availability depends on your video, your channel, and what YouTube's systems detect — it's not guaranteed for every upload.
How It Actually Works
YouTube scans your video for signals that suggest a topic change. Say you upload a 25-minute review called "Sony Camera Review: Is It Worth Buying?" — YouTube might generate something like:
0:00 Intro
1:20 Camera design
4:10 Image quality
8:45 Autofocus performance
12:30 Battery life
16:15 Video recording
20:40 Final verdict
The Upside
- Saves time on high-volume uploads
- Gives you a basic structure to work from
- Reduces manual editing
- Better than nothing for lower-priority videos
The Catch
Automatic chapters can misfire. Sponsor mentions or random stories might get flagged as topics. Titles tend to be generic ("Performance" instead of "Can This Laptop Actually Run Video Editing Software?").
Method 3: Generate Timestamps With AI
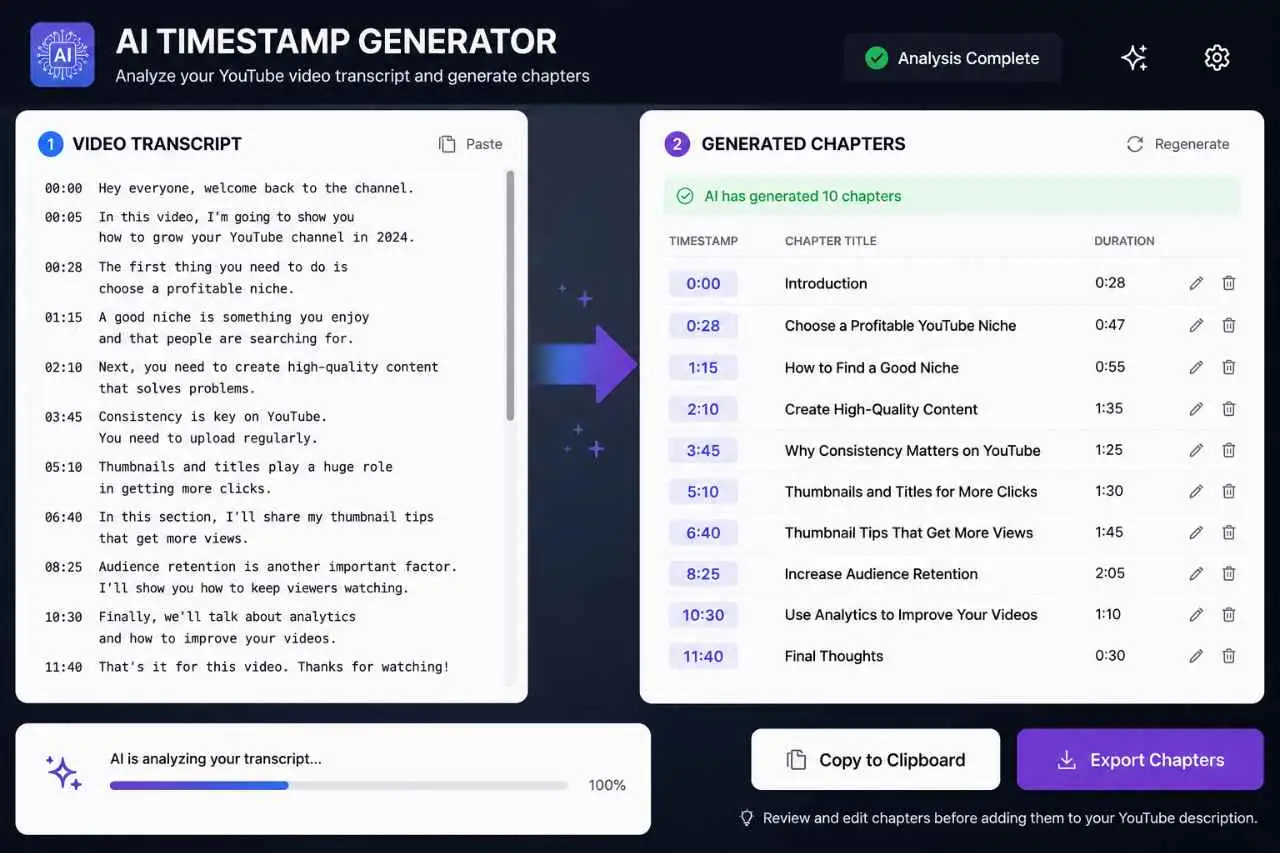
This is the method most new creators haven't tried yet, and it can genuinely save hours on long-form content — podcasts, interviews, hour-long tutorials.
The Basic Workflow
- Grab your video's transcript from YouTube Studio or your editing app
- Paste the transcript into an AI tool
- Ask it to identify major topic shifts
- Have it draft short, clear chapter titles
- Check the suggested timestamps against your actual video
- Edit anything that's off
- Paste the final version into your description
A Prompt You Can Actually Use
Analyze this YouTube video transcript and create accurate video chapters.

Requirements:
- Start with 0:00
- Use at least 6 chapters
- Keep titles under 60 characters
- Use clear, searchable language
- Focus on major topic changes
- Do not create chapters shorter than 10 seconds
- Return only the timestamp list
Example: A 70-Minute Podcast
0:00 Intro
3:25 How our guest got started on YouTube
10:40 Finding a niche that's actually profitable
19:15 How often should you really be uploading?
28:30 Never running out of video ideas
38:50 Growing with YouTube Shorts
49:20 What it takes to monetize
58:10 Landing your first brand deal
1:06:45 Final advice for new creators
⚠️ Quick Review Checklist Before Publishing AI Drafts
- Watch the first few seconds of every chapter
- Confirm the title actually matches what's said there
- Merge any chapters that feel too short or repetitive
- Rewrite anything generic
- Confirm the first chapter is
0:00
Method 4: Create Clickable Timestamp Links
Sometimes you don't want to edit the video description — you just want to send someone directly to a specific moment. Maybe you're sharing a clip in a blog post, a newsletter, a comment, or a community post.
Option A: Use YouTube's Built-In Share Feature
- Pause the video at the exact moment you want
- Click Share
- Choose the option to start playback at the current time
- Copy the link it generates
Option B: Build the Link Yourself
You can manually add a time parameter to any YouTube URL:
https://www.youtube.com/watch?v=VIDEO_ID&t=300s300s means 300 seconds — 5 minutes in. Want to jump to 12 minutes 30 seconds instead? (12 × 60 + 30 = 750s):
https://www.youtube.com/watch?v=VIDEO_ID&t=750sOption C: Drop Timestamps in a Pinned Comment
📌 Quick navigation:

0:00 Intro
1:40 Downloading the software
4:20 Installing everything
8:15 Creating your first project
12:30 Export settings
16:10 Fixing common errors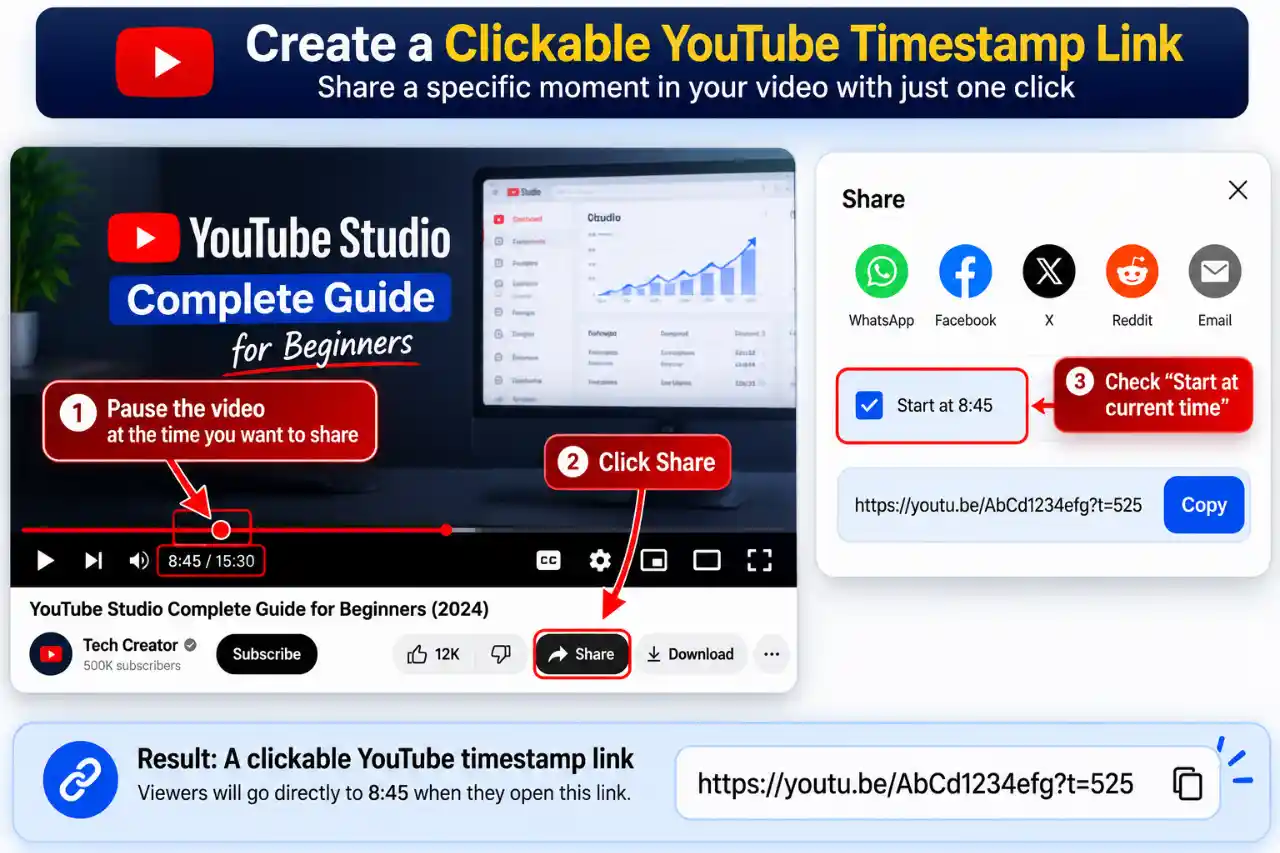
Writing Chapter Titles That Don't Sound Lazy
The timestamp itself is just a number. The title is what actually convinces someone to click — and what tells search engines what your video covers.
| Weak Title | Strong Title |
|---|---|
| Intro | What Are YouTube Chapters? |
| Step 1 | How to Add Timestamps in YouTube Studio |
| Tips | YouTube Timestamp Best Practices |
| Editing | How to Edit YouTube Videos Faster |
| Results | My YouTube Analytics After 30 Days |
| Final | Final YouTube Growth Checklist |
A Timestamp Template You Can Steal
0:00 Overview
0:45 Tools you'll need
2:20 Setting up
5:50 First step
9:30 Fixing common problems
13:15 Advanced settings
17:40 Final result
19:00 Final tips
0:00 Overview
1:30 Design and build
4:45 Key features
8:20 Performance test
12:10 Battery life
15:30 Camera quality
18:45 Pros and cons
21:20 Is it worth it?
Mistakes That Almost Every New Creator Makes
- Not Starting at 0:00 — If you start at 0:25, YouTube won't trigger chapters.
- Fewer Than Three Chapters — YouTube needs 3 minimum.
- Chapters That Are Way Too Short — Each chapter needs at least 10 seconds.
- Vague, Copy-Paste Titles — Use real searchable questions instead of "Part 1".
- Overloading With Chapters — A 10-minute video doesn't need 25 chapters.
- Overpromising in the Title — Keep titles accurate to what's actually discussed.
- Not Checking the Final Result — Always open the video publicly to verify chapters show up on the timeline.
Frequently Asked Questions
How do I add timestamps to a YouTube video?
Open YouTube Studio, select your video, go to the description, and add a list starting at 0:00 with at least three timestamps in order and clear, descriptive titles.
How many timestamps do I need for chapters to show up?
At least three. Fewer than that and YouTube won't generate chapters.
Do timestamps have to start at 0:00?
Yes — that's required for YouTube to recognize your list as chapters instead of plain text.
How long does each chapter need to be?
At least 10 seconds.
Can I add timestamps to a video I already published?
Yes. Just edit the description anytime and add them — no need to re-upload.